


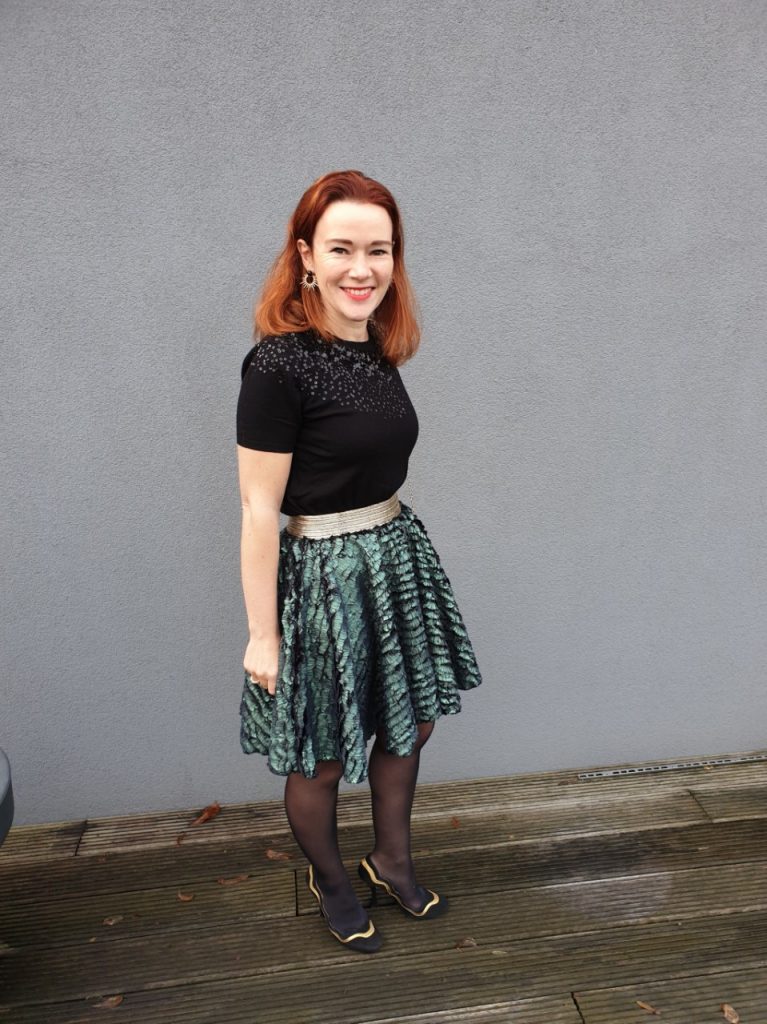
The circle skirt, as the name suggests, is a skirt cut from a circle of fabric. It is also called the skater skirt. It is also "The spinning skirt" because it is made from a substantial length of fabric that allows a nice drape and lots of freedom of movement.
You can cut it from a single piece of fabric or in several panels that will then need to be assembled.
There are many advantages to this skirt model:
- it is very simple to sew especially if you cut it from a single piece of fabric
- it does not require buying a pattern (we will see below how to make it yourself)
- it can be made with almost all fabrics (we will exclude lycra though)
- you can change the length easily given its very simple construction (mini, midi, maxi)
- you can use this same model (simply by changing the dimensions) for a little girl as well as for an adult woman
- you can make an elastic or fabric waistband as you choose
- it can be lined without difficulty and even have pockets added
- it is very quick to sew and makes an excellent piece to make your first garment
- and then... for some (and I include myself) it’s a return to childhood with this skirt that spins, flies...

So how to make your pattern?
We will construct a quarter circle corresponding to your waist.
The first step is therefore measuring the waist circumference. Remember to take the measurement with a tape measure placed at the narrowest part of the abdomen after exhaling. Do not suck in your stomach (there's no point in cheating) and do not puff it out either.
Example: my waist measures 64cm
The second step is the calculation of the radius.
Let's go back a few years to your math courses. Remember, to calculate the radius of a circle from its circumference, you must use the formula:
Circumference/2 π = radius
Example: my circumference is 64cm
I divide 64 by 2 π, that is 6.28, and I get 10.2cm which corresponds to the radius of my waist.
 circle skirt: 4 panels
 1 panel
The third step is to add a little ease so you can put on your skirt by passing it over your hips. If you don't add ease, you won't be able to put it on from the bottom; you will have to put it on over your shoulders.
There are two schools:
- or you add ease before calculating the radius (previous step)
- either you add ease after calculating the radius (never more than 2cm, or you risk losing your skirt)
For my example: I rounded to a radius of 12cm (adding 1.8cm)
The fourth step is to define the length of the skirt.
To help you, you can look at your own skirts to define the skirt length you prefer to wear.
Given my height, I only wear skirts above the knee. So I chose a length of 40cm.
Now that you have all your measurements (yes, only two to make a pattern... isn't that magical?); the fifth step is to draw the quarter circle using a compass or a graduated set square.
Take a right angle of your paper and mark the radius measurement on both sides. Then, draw the curve connecting these two points.
Do the same to mark the length of your skirt.
You now have a quarter of your skirt pattern. This quarter of the skirt does not include seam allowances. You can therefore use it to cut a piece of fabric in one go by folding your fabric in 4 and placing your pattern on the corner gathering the fabric folds.
Most of the time, if you cut an adult pattern, you will need fabric with a width of 140cm. The 110cm fabric is often too narrow, risking having a very short skirt.
If you want to use fabric with a width of 110cm, you may need to cut the fabric into 4 panels; in this case, don't forget to add seam allowances to join your 4 pieces of fabric.
Your sixth step is to cut your fabric.
Beware of traps: the direction of patterns, nap, velvet...
If your fabric has a pattern that must be oriented in only one direction, you cannot cut your fabric in a single piece. Otherwise, your pattern will end up upside down in one part of your skirt.
For beginners, I recommend a plain fabric or one with a repetitive pattern without direction (flowers, polka dots...).
 Circle skirt cut in a single piece of fabric
The seventh step for those who have several panels is to assemble them with a straight stitch. Don't forget to overlock the sides and press your seam allowances open. If you want to line your skirt, do these same steps with the lining. I advise you to hold them together with a 0.5cm stitch before placing the elastic.
 Lined skirt
Only 2 steps remain: attach the waist elastic and finish the skirt edge.
For the eighth step, you will need an elastic. Choose one with good hold and good recovery when you stretch it (it is what will hold your skirt, so it must be of good quality, otherwise you might end up in your underwear). Choose an elastic at least 3cm wide for your comfort.

All whimsies are possible for the choice of elastic: glittery, lurex, golden...
To determine the length of the elastic, take your waist measurement and subtract 4cm. You have the length of your waistband. Add 2cm for seam allowances.
In my example: 64cm waist - 4cm = 60cm (length of the elastic) + 2cm seam allowance = I cut a length of 62cm.
Close your elastic to form a circle.
Determine the centers front, back, and sides of the elastic and your skirt to pin them harmoniously.
For those who don't feel comfortable, you can baste the whole by stretching the elastic. If you wish, use the overlocker for this step.
 Sewing the elastic with the overlocker
All that remains is to finish the bottom of the skirt, I offer you 3 options:
- the rolled hem with the overlocker (quick and necessary for some fabrics)
- the classic hem
- applying a bias tape on the fold (very long but so classy)
For my part, I most often make a small rolled hem that doesn't weigh down the skirt and sometimes I allow myself to make it contrasting or golden for more whimsy.

Now you know how to do it so ... Get your machines ready!


1 thought on “Make your circle skirt without a pattern and without worries.”
Marie Cécile Coulon
Bonjour !
Où est situé votre magasin svp ?
Merci et belle journée à vous !
MC